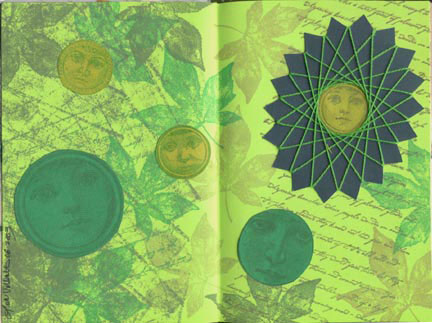
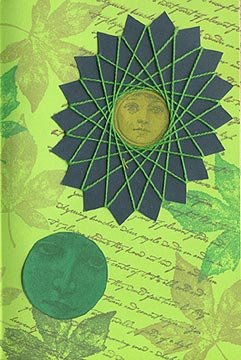
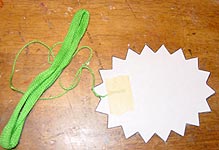
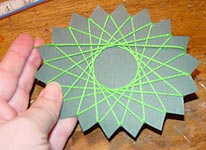
 A couple of months ago, I came across a term I’d never heard before: spirella. “What’s a spirella?” I asked. After three minutes of trying to explain it with words, my friend finally held one up for me to see—so, I’m doing the same thing for you. The image at left contains a spirella worked in light green thread on dark green cardstock. I tucked a little rubber stamped face in the center opening to dress it up a little, but that spiral thread work is a spirella. Wasn’t that easy?
Below are the basic instructions to make any spirella. You’ll find patterns on this site for circle and oval templates, but the instructions remain the same no matter which pattern you choose.
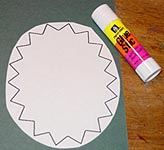 To work a spirella, you’ll need a template pattern. Print one from the links above, or draw your own. (Or, a tip from a friend: use a scalloped mega-punch or die-cut as your template.) A good spirella template has notches to hold the threads in place, and can be any shape.
I print my templates on plain paper, and mount them to cardstock using a glue stick.
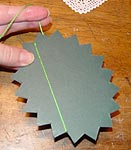
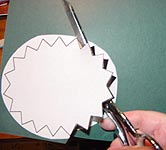 Cut out the template. Make the cuts for the notches straight and crisp.
 For my green spirella, I used bright green craft thread, which is very much like perl cotton for those of you into needle arts. Any thread can be used, although I’ve had the best success with threads that are smooth rather than textured, and lightweight rather than bulky. Attach the end of your thread to the back side of the template with tape—I used masking tape here so you could see what I was doing, but clear tape will work just as well.
 Bring the thread to the front side of the template through one of the notches. Choose a notch on the other side of the template, and wrap the thread through it. The closer the notch is to straight across the template, the smaller your center hole will be. I chose one notch over from straight across, for a small hole. Experiment with using different spacing, and you’ll see what I mean.
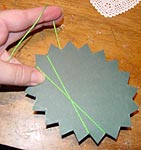 OK, this is the really easy part: just wrap your threads back and forth, from one side of the template to the other. I moved clockwise, and wrapped through every notch. Here, you can see what the spirella looks like after wrapping through four notches
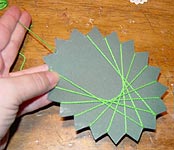 Just keep working your way around the circle. At some point, you’ll notice that some notches are getting two pieces of thread in them, while others are still empty. This is not a mistake! All your notches will eventually have two pieces of thread through them. Don’t ask why this works out—it just does.
 All the way around the circle, with two threads in each notch. What a lovely spirella—and it’s almost complete!
Flip your spirella over, and anchor your thread with another piece of tape. Trim your threads, and you’re ready to apply your design to the front of a card, a scrapbook page…
 …or in my case, an altered book layout.


